Spread of open software and applicationsUsing laboratories that employ free software (operating systems and applications) aligns schools to the principles of independence and neutrality of taught technologies. Such framework allows the maximumfreedom use the technology and to deepen student’s knowledge about it. Both when studying, and on the job track, students and teachers will be able to use the same software at their own house.Creation of a community among teachersSpecifically among the teachers responsible for the laboratories, that have the exact identical software available. With the collaboration of these people, other teachers can be involved too: both challenges and didactic opportunities are often common ground.DocumentationLTSP- using two network interface controller (NIC)OpenScuola laboratories use a LTSP server (teacher’s terminal) and thin clients (students’ terminals). The bottleneck is often the connection speed between the server and the switch connected to the clients,due to the high bandwidth requirements form non-compressed video streaming from server to clients.
Con lo scopo di aumentare la banda passante tra server LTSP e client del laboratorio si può utilizzare, se la rete dispone di uno switch manageable, un bonding tra interfacce di rete.
Semplificando, il bonding permette di usare più interfacce di rete distinte come una sola aggregando la banda di ognuna di esse. Da notare che si aumenta la banda passante solo tra server e switch del laboratorio.
Occorre impostare una specifica configurazione sui due estremi del collegamento (ovvero sul server e sullo switch).
Configurazione Ubuntu 18.04
Sul server LTSP (Ubuntu 18.04 con netplan) si edita il file /etc/netplan/config.yaml in questo modo:
-
- nella sezione ethernets si specificano i nomi delle interfacce che verranno aggregate, questo è comodo per fare un match con l’indirizzo MAC al fine di essere indipendenti dalla posizione della scheda di rete sulla motherboard;
- creiamo una sezione bonds che contiene un interfaccia “virtuale” che aggrega le interfacce definite nella sezione ethernets utilizzando il protocollo 802.3ad per usare efficientemente tutti i link disponibili (load balance e fault tolerance);
Il risultato finale è questo:
network:
  version: 2
  renderer: networkd
  ethernets:
    iface_out:
      match:
        macaddress: ec:08:6b:04:cb:81
      dhcp4: true
      nameservers:
        addresses: [208.67.222.123, 208.67.220.123, 8.8.8.8, 8.8.4.4]
    lab_nic1:
      match:
        macaddress: c8:d9:d2:12:3e:97
    lab_nic2:
      match:
        macaddress: 00:e0:4c:68:6e:b3
  bonds:
    iface_lab:
      interfaces: [lab_nic1, lab_nic2]
      addresses: [10.100.10.10/24]
      parameters:
        mode: 802.3ad
        mii-monitor-interval: 1
Maggiori informazioni sul significato di questi parametri sono disponibili qui.
Eseguire netplan apply per applicare la configurazione.
Configurazione switch Zyxel GS1900-24E
Lo switch presente nella maggior parte dei laboratori OpenScuola è lo Zyxel GS1900-24E. Per configurare l’arrivo del bonding dal PC Docente:
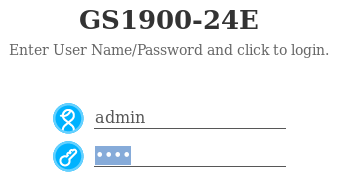
- Accedere all’intefaccia web dello switch all’url
https://10.100.<LabCode>.1/
- Selezionare Configuration
- Selezionare Link Aggregation
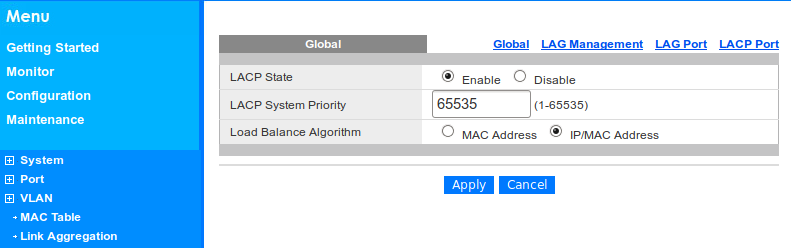
- Abilitare LACP State
- Selezionare Apply
- Selezionare LAG Management
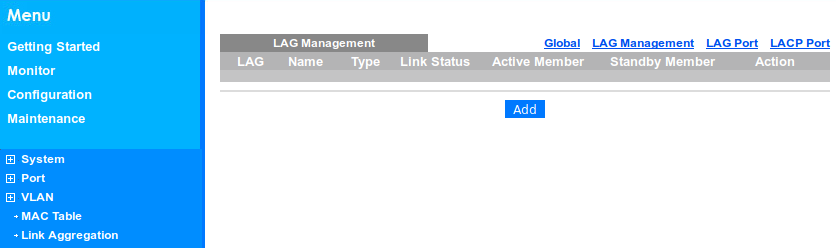
- Selezionare Add
- Inserire come nome Postazione Docente e come porte attive quelle collegate alla postazione docente
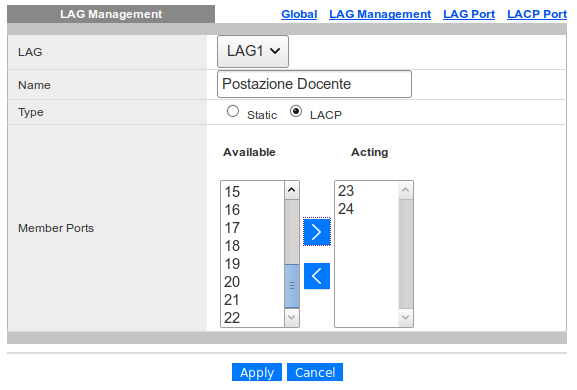
- Impostare come tipo LACP
- Selezionare Apply
- Dopo aver testato il corretto funzionamento del LAG salvare la configurazione selezionando Save

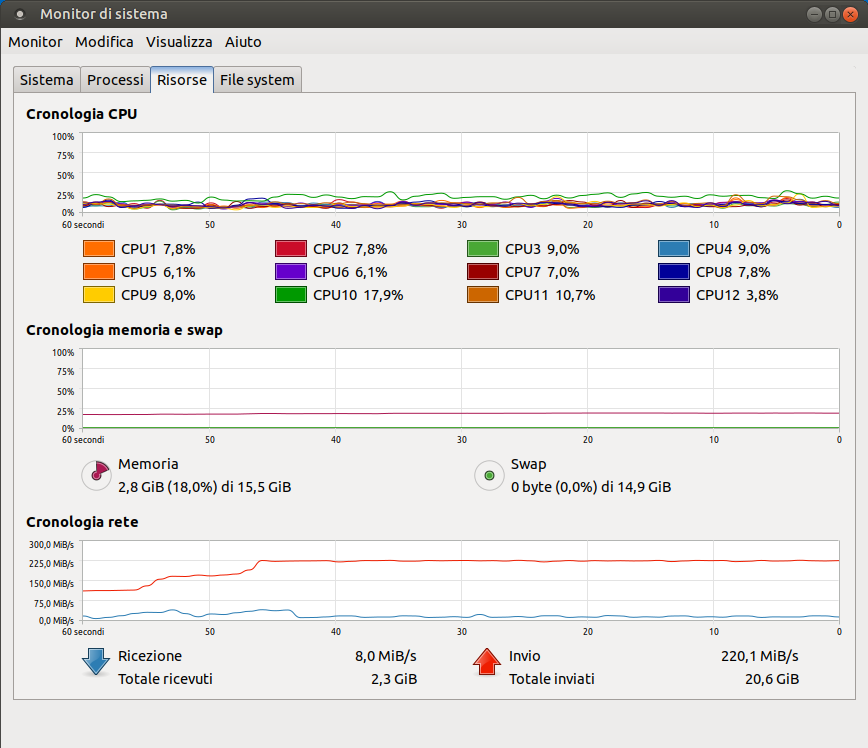
Prove di carico
Eseguite con due interfacce gigabit ethernet saturando la banda disponibile: